Learning how to install roll roofing in Lakewood Ranch, FL is a realistic weekend project for a shed, workshop, or detached garage roof. The catch is that Florida's wind rules, humidity, and storm timing change a few steps most national DIY guides skip entirely. This guide walks through every step, the code minimums that apply here, and exactly when the job stops being a DIY project.
Is Roll Roofing Right for Your Lakewood Ranch Structure?
Asphalt roll roofing is a mineral-surfaced material sold in long rolls instead of individual shingles. It's built for low-slope roofs on sheds, workshops, and other secondary structures, not primary homes.
It's the cheapest roofing option available, but that thinner profile means a shorter service life than shingles or metal. Material costs typically run $1.50 to $7.50 per square foot, with each roll covering roughly 96 to 100 square feet. Lifespan runs about 5 to 8 years, compared to 20-plus years for composite shingles.
Roll roofing works on low-slope roofs with a minimum 2:12 pitch in practice, though national model code sets the technical floor lower. Mineral-surfaced roll roofing shall not be applied on roof slopes below one unit vertical in 12 units horizontal (8-percent slope) , but most manufacturers still recommend staying at 2:12 or steeper for reliable drainage. Florida's adopted residential code is specific about the material itself, too: mineral-surfaced roll roofing shall conform to ASTM D3909 or ASTM D6380, Class M or Class WS . Check the roll's label against that spec before you buy.
Here's how roll roofing stacks up against two common low-slope alternatives:
| Material | Cost (per sq. ft.) | Typical Lifespan |
|---|---|---|
| Asphalt roll roofing | $1.50 – $7.50 | 5 – 8 years |
| Architectural shingles | $4.50 – $9.00 | 25 – 30 years |
| Standing-seam metal | $8.00 – $14.00 | 40 – 70 years |
Lakewood Ranch's UV exposure and storm season tend to push roll roofing toward the shorter end of that range. If the structure in question is a primary residence addition rather than a shed, it's worth comparing options on the TPO roof installation guide for Lakewood Ranch before committing to roll roofing.
Tools and Materials You'll Need
Gather everything before you climb the ladder. Running up and down for a forgotten tool is how afternoons get eaten in Florida's humidity.
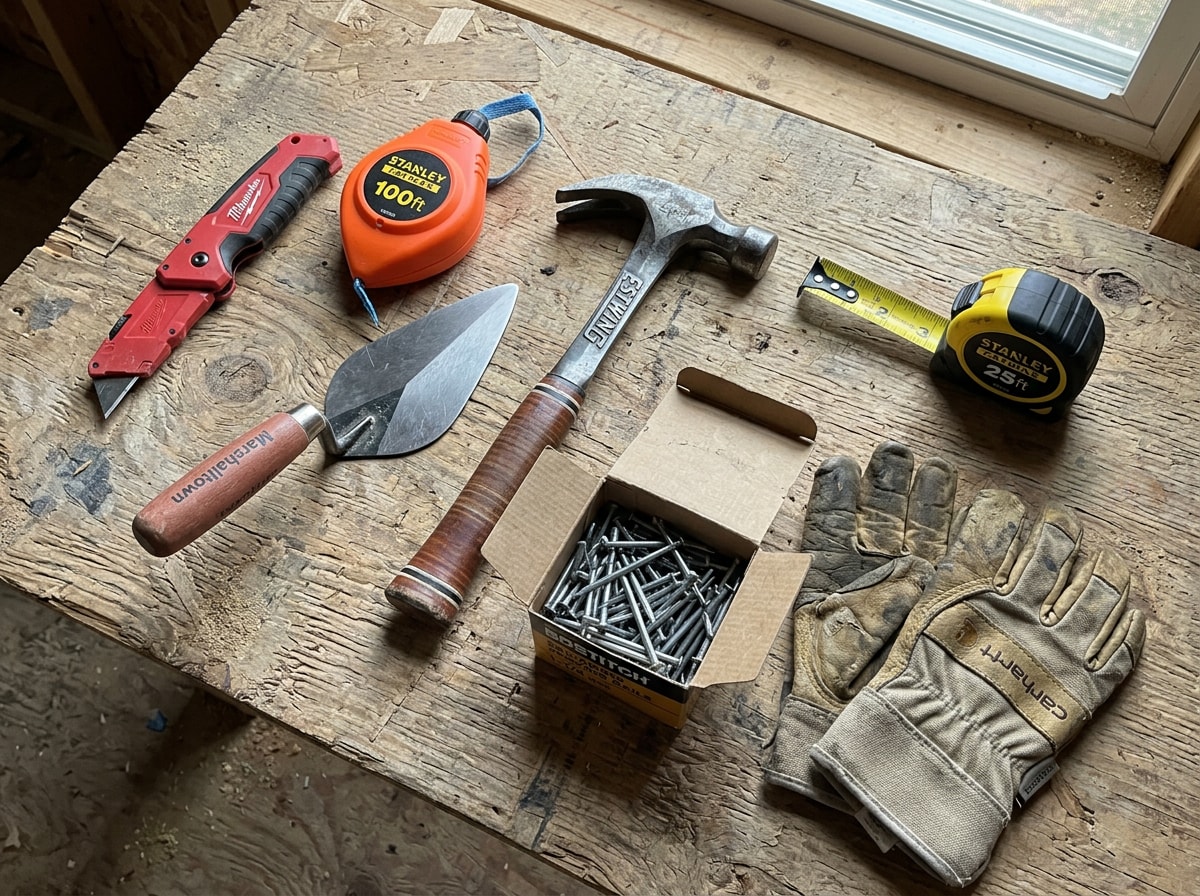
Tools:
- Extension ladder
- Hammer and tin shears
- Tape measure and chalk line
- Paint roller cage, roller covers, and extension pole
- Utility knife and trowel
- Shingle stripper (only needed for tear-offs)
- Work gloves and safety glasses
Materials:
- Mineral-surfaced (MSR) roll roofing
- Roll roofing adhesive and roofing cement
- Galvanized roofing nails
- Metal drip edge flashing
Buy 5-10% more material than your measurements suggest. That overage covers cutting waste and mistakes without a second trip to the supply store.
Step-by-Step: How to Install Roll Roofing
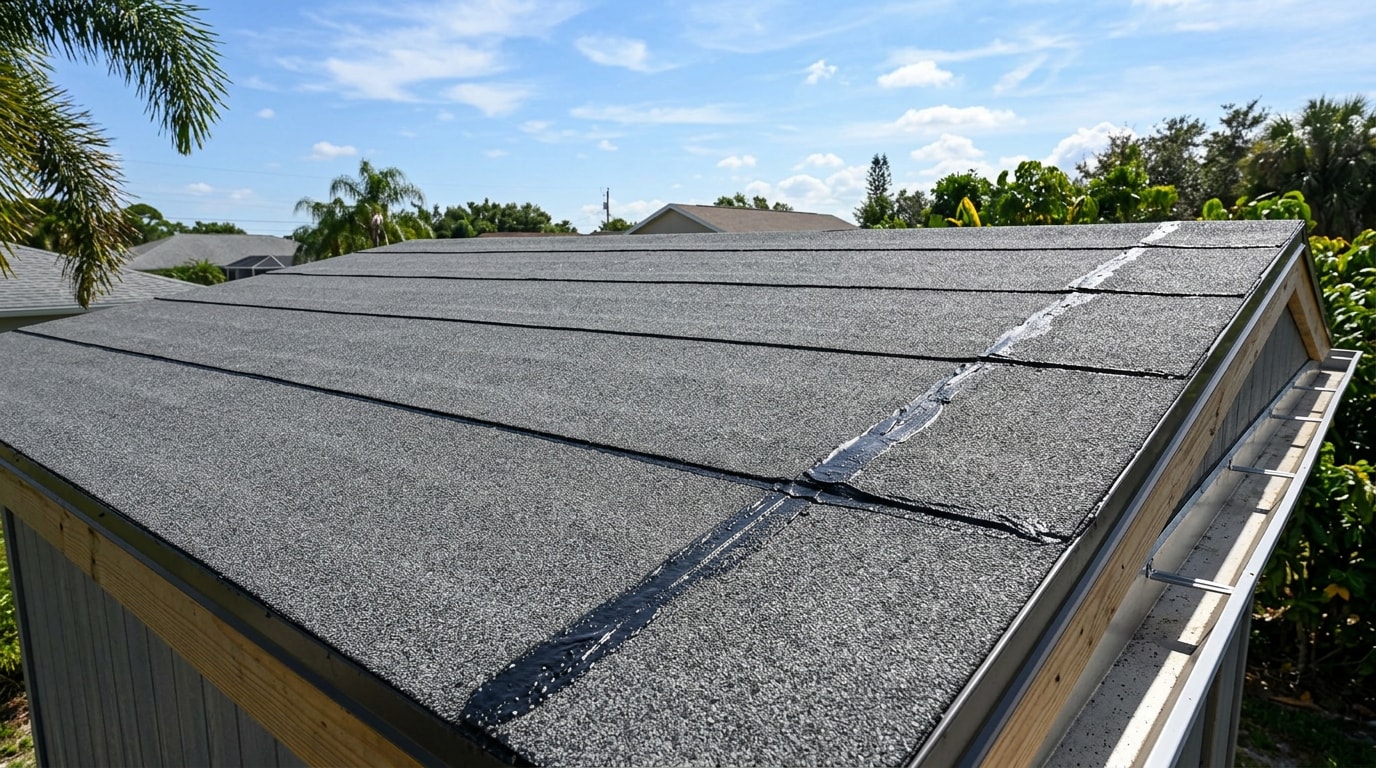
Work from the eave toward the ridge, overlapping each row and sealing every overlap with cement. Nails go along the top edge; cement seals the bottom overlap.
1. Prepare the Roof Deck
Check the plywood or OSB sheathing for soft spots, water damage, or rot, and replace any damaged panels first. Hammer flat any protruding nails or staples. Even a minor bump can wear through thin roll roofing over time. Once the deck is clean and sound, measure the full area to confirm how many rolls you need.
2. Install the Drip Edge
Drip edge directs water into the gutters instead of letting it wick back under the roofing and into the fascia. A drip edge is required at the eaves and rakes of asphalt shingle roof systems, and its flange should extend back onto the roof surface a minimum of 2 inches . The same logic applies to roll roofing installations: use at least 26-gauge metal, overhang the deck edge by about 1/4 to 3/8 inch, and nail it along the full perimeter, mitering the corners.
3. Lay the Underlayment
Roll out 15-pound asphalt-saturated felt horizontally, starting at the bottom edge and overlapping each row by at least 2 inches. This layer is a secondary moisture barrier beneath the roll roofing, which matters here given how often afternoon humidity rolls in during spring and summer.
4. Install Starter/Edge Strips
Cut 9-inch-wide strips of roll roofing and nail them along the eaves and rakes, overhanging the deck edge by 1/4 to 3/8 inch. These strips create a double layer of protection at the points where wind-driven rain finds its way in first.
5. Snap Chalk Lines for the First Course
Measure 35 inches up from the bottom of the roof on both the far left and far right sides, and mark each spot. Run a chalk line between the two marks and snap it firmly to leave a clear guideline across the deck.
6. Apply Roofing Cement
Using a roller and extension pole, spread adhesive evenly across the chalk-marked section before laying any material down. Work in smaller sections so the cement doesn't skin over before the roofing goes on top of it.
7. Lay and Nail the First Course
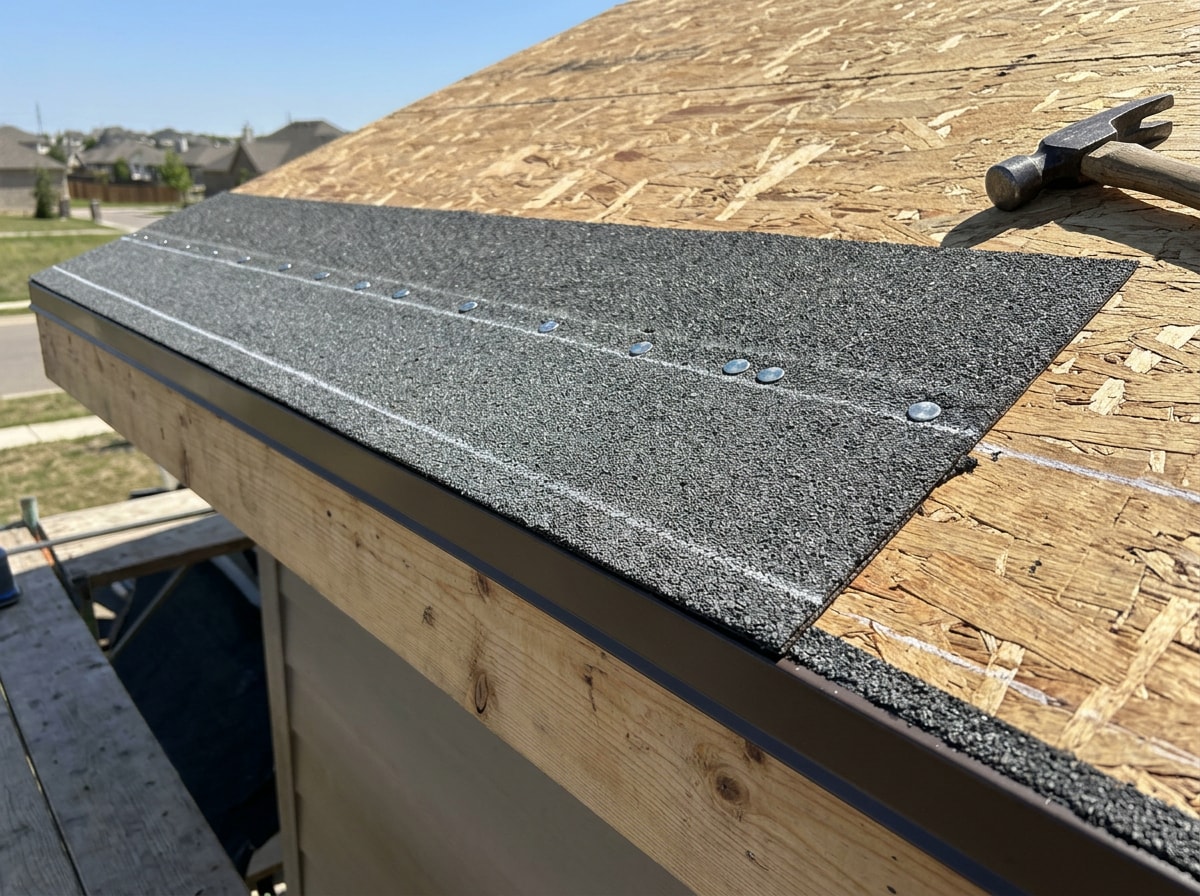
Align the first row up to the chalk line, then nail it with galvanized roofing nails spaced every 6 to 10 inches and about 1 inch from the edges. Hammer each nail flush so the head sits level with the surface rather than denting or puncturing it.
Manatee County sits in a coastal high-wind zone under the Florida Building Code, and fastener spacing here is sized against that wind exposure rather than a generic national default. Table R803.2.3.1 specifies the maximum fastener spacing based on framing specific gravity, exposure category, and wind speed . In practice, that means tightening nail spacing toward the lower end of the range (closer to 6 inches) rather than defaulting to 10.
8. Overlap, Nail, and Seal Every Seam
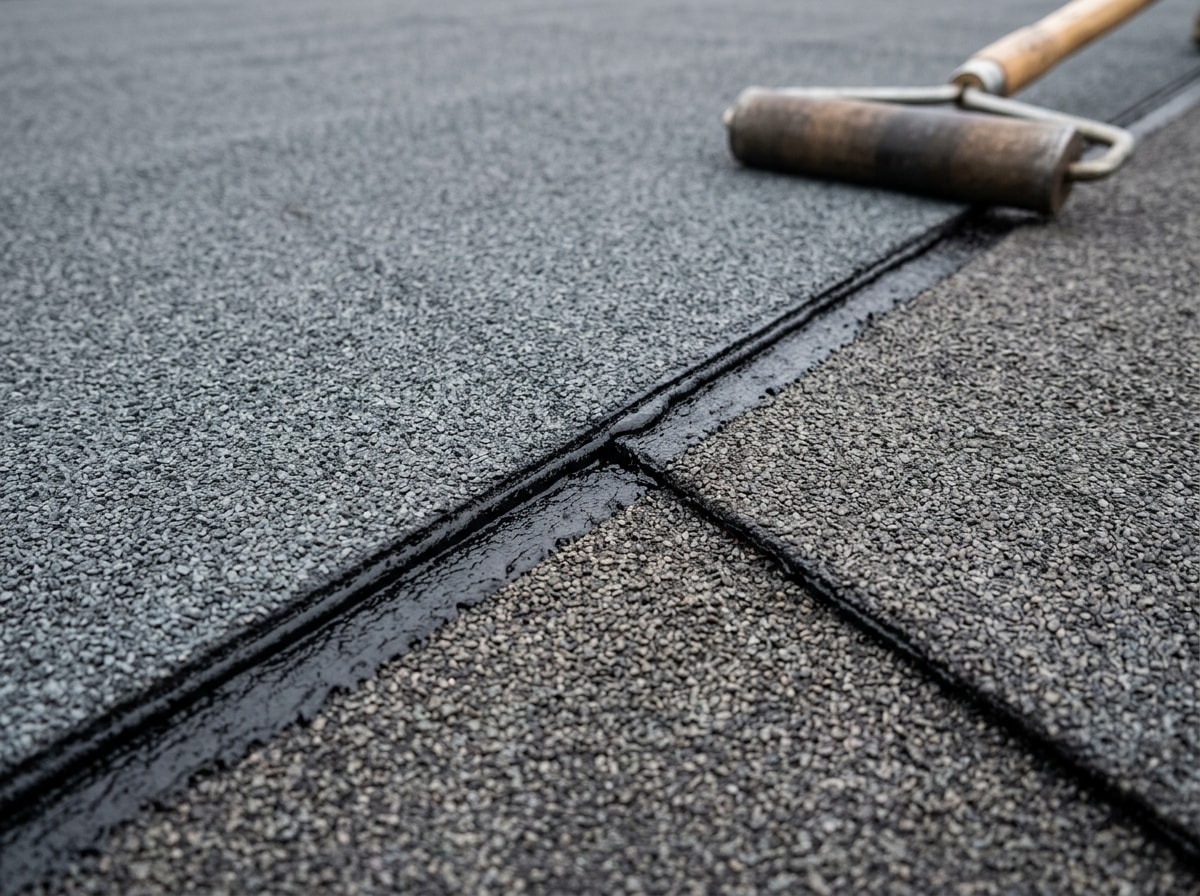
Clean the overlap area, then apply a full coat of lap cement across the entire 6-inch overlap zone. Press the overlapping sheet down firmly and run a weighted roller over every cemented seam for complete, uniform adhesion.
Skipping or rushing this step is the most common reason DIY roll roofing jobs develop leaks within the first year. Repeat courses up to the ridge, staggering seams as you go.
Safety Considerations
A 100-square-foot roll of roofing weighs close to 75 pounds, and combined with working at height, this isn't a project where shortcuts are worth the risk. Federal rules back that up directly: each employee on a walking/working surface with an unprotected side or edge which is 6 feet or more above a lower level shall be protected from falling by use of guardrail systems, safety net systems, or personal fall arrest systems , per OSHA's fall protection standard. That rule is written for employers and crews, but the physics don't change for a homeowner on a ladder.
Work in tandem with a partner: one person handing materials up, the other receiving them at the roofline. Wear a safety harness anchored to a solid structural point, inspect your ladder before every climb, and avoid working alone on anything steeper than a gentle slope.
Timing: When to Install Roll Roofing in Lakewood Ranch's Climate
Dry weather is non-negotiable. Installing in damp or rainy conditions traps moisture between the deck and the roofing, which leads to rot, mold, and premature failure. Skip the job entirely if rain shows up anywhere in the forecast.
In Lakewood Ranch, that usually means scheduling early morning starts during spring or fall. Summer afternoons bring near-daily thunderstorms and sticky humidity that slows cement curing, which makes a stable multi-day forecast more important here than it would be in a drier climate. Check more than just the morning-of forecast before you start.
When to Call a Licensed Roofing Contractor Instead
A typical roll roofing job runs 6 to 8 hours of working time, which makes it a reasonable weekend project for a shed or small outbuilding. Larger roofs, steeper slopes, valleys, or roofs with multiple penetrations (vents, skylights, chimneys) introduce complexity that's easy to underestimate from the ground.
In the field across Sarasota and Manatee County, the mistakes that turn into callbacks are almost always seam-related: cement applied too thin, overlap sections nailed before the cement sets, or courses started without checking the deck for soft spots first. If your project checks any of the "larger or more complex" boxes, get a quote from a licensed roofing contractor before buying materials. An inspection up front can also confirm whether the deck underneath is even worth re-covering, versus needing a full replacement.
Get a free estimate from {{SITE_URL}} before you commit to a DIY timeline, especially if the structure sits close to a property line or falls under an HOA review in Lakewood Ranch.
FAQ
Can I Install Roll Roofing Myself?
Yes, for small, low-slope structures like sheds and detached garages. It only requires basic tools: a hammer, roofing nails, a utility knife, a chalk line, a tape measure, and a trowel or caulk gun for cement.
Do You Nail Roll Roofing?
Yes. Nails must be long enough to penetrate through the roofing and into the deck, with 1-inch to 1-1/4-inch galvanized roofing nails standard for most installations. Nails that are too short reduce holding power and can let seams lift in high wind.
Does Roll Roofing Need Adhesive?
Some products are self-adhering with a peel-and-stick backing. For standard mineral-surfaced roll roofing, roofing cement is required at every seam to keep water from working its way underneath.
What Is the Minimum Slope for Roll Roofing?
The national model code sets the floor at 1:12 (8 percent slope), but most manufacturers and installers treat 2:12 as the practical minimum for reliable water shedding. Below that, a welded membrane or modified bitumen system is the better fit.
Can Roll Roofing Be Installed Over Existing Shingles?
Technically yes, but it's not recommended. Removing the old shingles first gives you a flatter surface and a chance to check the deck underneath for rot before covering it up.
How Many Square Feet Will a Roll of Roofing Cover?
A standard roll covers roughly 96 to 100 square feet. Always buy a small overage beyond your measured square footage to account for trimming and overlaps.
What Is the Best Roofing Option for a Low-Slope Roof?
Roll roofing, modified bitumen, and TPO are the three most common low-slope options. Roll roofing fits sheds and short-term structures well, while modified bitumen or TPO make more sense for larger low-slope areas on a primary home. For material comparisons specific to this area, see the roofing materials overview or browse roof coating options if you're looking to extend an existing low-slope roof's life instead of re-covering it.